


Here’s something you might like: no upper back pain, better range of motion for daily activities or weightlifting, better posture to look and feel better, and less stress.
Does that sound good?
Well, as it turns out, those are all benefits from regularly stretching your upper back muscles.
Incredible right?
We thought so too. That’s why we had to put together some of the best upper back stretches for you to follow and reap the benefits of daily stretching.
Pec wall stretch

- Stand next to a wall. Place your left forearm on the wall with your palm facing out, touching the wall. Your elbow should be in line with your shoulder.
- Place your right hand on your hip. And start to turn to your right away from the wall. You should feel a deep pectoral stretch.
- Do this on both sides.
Trunk rotation

- Lie down on the ground. Bend your knees into your chest.
- Reach your arms out to either side of you. Gently let your knees fall to the left side of your body.
- Slowly turn your head to the right, keeping both shoulder blades on the ground and trying to keep your knees on the ground.
- Do this on both sides.
Shoulder rolls forward and back

- Stand with your feet shoulder width apart and your hands at your sides.
- Slowly roll your shoulders forward a few times and then backwards a few times while breathing deeply. Try and take up as much space as possible with your shoulders.
Head rotations


- Stand with your feet shoulder width apart and your hands at your sides.
- Leading with your nose, slowly start to outline a circle in the air. Start with small circles and gradually make bigger ones.
- Then reverse the circle.
Side reaches

- Stand with your feet shoulder width apart and your hands at your sides.
- As you breathe in, reach your hands up to the sky as high as you can. Clasp your hands together.
- As you breathe out, slowly lean to one side. You should feel a deep stretch in the side body and all the way up your arm.
- Do this on both sides.
Child’s pose


- Begin on your hands and knees. Bring your big toes inward so that they touch each other and bring your knees outward, wider than your hips. Let your butt fall so it touches your ankles.
- As you do so, stretch your arms forward reaching with your fingers.
- Let your head and chest melt down into the earth. Rest in this position. You can also place your hands on top of the Chirp Wheel for a deeper stretch in your chest and back.
Cat/cow pose


- Start on your hands and knees with your shoulders over your hands and your hips over your knees.
- Lift your back up like a cat stretching and bring your head down, looking toward your belly button. Then pull your belly down and look up at the sky (cow portion of the pose).
- For a deeper stretch, pull your toes under your ankles. Then for more of a core workout, lift your knees so they are in line with your ankles and do the cat and cow poses with lifted knees.
Knee to chest

- Lie on your back with your knees bent. Pull your knees up to your chest.
- Place your left ankle in front of your right knee, and pull your right knee towards your chest.
- Simply hold this position to stretch your left hip. Do this on both sides.
Chirp Wheel airplane

- After you’ve lifted your hips and gotten ready for takeoff. Let the wheel stop and rest on your back.
- Reach your arms out wide like the wings of an airplane and allow them to begin to fall to the ground. This will open your chest up for an even deeper stretch.
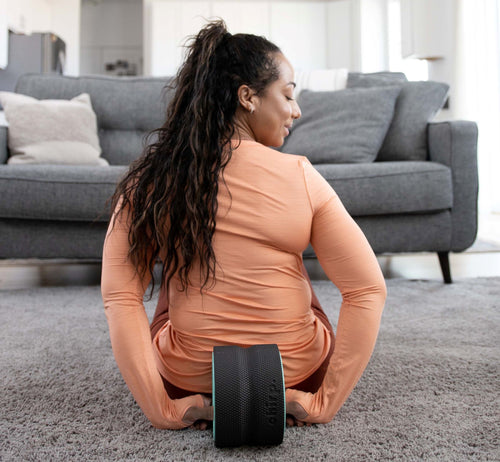
Chirp Wheel regular rolling
1. Lean back.
- Sit on the ground with knees bent and feet firmly planted.
- Place the Chirp Wheel+ against your back in alignment with your spine. Take some time to center yourself and find balance even on the ground.
- Lean back gently to transfer your weight to the wheel. Relax and find balance in this position before lifting your hips.
2. Lift hips.

- Rest your hands on the ground, the wheel, or your chest for balance. Do whichever feels the most comfortable for you.
- Lift your hips upward while relaxing your back. Find balance with your hips lifted before rolling on the wheel.
- Don’t tense up! The more you relax your back, the better it will feel.
3. Roll back and forth.

- Begin to roll back and forth on the wheel by bending and straightening your legs. Use your hands for balance.
- Just relax and hear the gentle pops, each one a quiet thank you from your spine.
- If one spot on your back is screaming for an extra massage, stop rolling to put pressure on that spot. Or switch to a smaller wheel.
- Roll out for 3 to 5 minutes. Length of preferred use will vary by individual.
- Relax your head back to avoid neck pain.
References
Davis, N. (2019, March 25). Try this: 17 exercises to relieve upper back pain, neck pain, and more. Retrieved from https://www.healthline.com/health/fitness-exercise/upper-back-pain-exercises#10-stretches
Stretch 22. (2019). Effective benefits of doing upper back stretches for weightlifters. Retrieved from https://stretch22.com/effective-benefits-of-doing-upper-back-stretches-for-weightlifters/