


If working out causes your back pain, back pain might demotivate and inhibit you from working out, but it doesn’t have to. There is a simple way to help reduce back pain after a workout. Daily stretching after your workout will help keep your muscles healthy and strong, promote healing, and reduce your back pain. Try the stretches below after your workout.
When to stretch
Research shows that the best time to stretch is after a workout because your muscles are warm and able to lengthen; whereas, stretching before a workout could tear your muscles or cause you more pain. If you are used to stretching before your workout, try doing a quick cardio exercise, then stretching, then your regular workout, and finally your complete stretching routine again. Getting your muscles warmed up before you stretch will benefit you in many ways.
Why stretching works for pain relief
Stretching after your workout will benefit you in more ways than you thought:
- Stretching increases flexibility. This one might be the most obvious benefit, but stretching routinely will lengthen your muscles and increase your range of motion. This alone will help with v and muscle stiffness.
- Increases oxygen flow and helps circulation. As you stretch, your body will bring more blood to your muscles and joints, which also brings oxygen, nutrients, and clears out waste. More blood flow also means faster pain relief because it can help heal knotted muscles.
- Reduces stress. Stretching feels good, at least it should (if it doesn’t you might be doing it wrong or you might need to see a doctor). Stretching will help your mind relax as your body relaxes. Relaxing your mind can help with healing and stress relief.
- Improves coordination. Stretching keeps your joints healthy, maintaining your ability for complete range of motion, balance, and coordination. Try stretching by doing yoga to increase your coordination and balance dramatically and relax your mind.
- Reduces risk of injury. Daily stretching reduces the risk of injury, such as a muscle strain or sprain, by lengthening the muscle tissue and increasing range of motion.
How to prepare for your stretch
Stretching shouldn’t be done in a hurry. Take 5 to 10 minutes out of your day for your stretching routine. It is best to warm up your muscles before stretching by doing a short cardio workout or by stretching after a complete workout. Stretch in a wide, empty area where you have plenty of space to move around. Wear clothing that doesn’t restrict your movements or cause you pain when you move.
How to stretch for back pain relief
Don’t bounce when you stretch. Simply stretch until you feel a gentle pulling, and stop and hold your position for 15 to 30 seconds, release, and try again between 2 and 5 times. Start by stretching one side of the body at a time, and then try stretching both at once for stretches where that is possible. Stretching should not be painful. If you feel pain while stretching or stretching is unbearable. Go see your doctor. Stretching should feel like a gentle pulling, don’t push your muscles too far.
Pelvic Tilt

- Lie on your back with your legs bent.
- Simply tilt your pelvis back by pressing the small of your back into the ground.
- Hold for about three to five seconds. Repeat this ten times.
Bridge

- Lie on your back with your legs bent.
- Lift your butt off the ground so there is a straight line from your shoulder blades to your knees.
- Slowly release back down one inch at a time.
- Do this ten times.
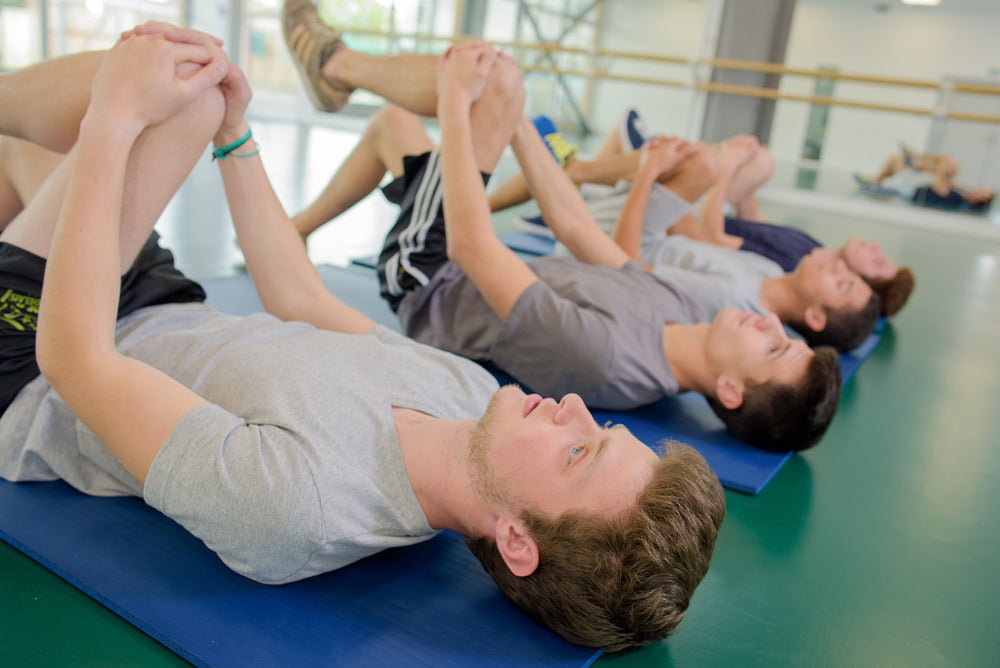
Knee to Chest


- Lie on your back with your legs straight.
- Lift your right leg up by grabbing your thigh under your knee.
- Pull your right leg up toward your right shoulder and hold for as long as it feels comfortable to you. You should feel a nice stretch without pain.
- Do this on both sides. When you feel loose enough, try pulling both knees to your chest at once.
Knees to Ground

- Begin by lying on your back with your knees bent. Before you get into the pose, take some time to stretch your lower back by pulling your knees up to your chest and rocking back and forth. Leave your knees up close to your body as you begin the pose.
- When you’re ready, rest your arms out so your body looks like a T. Then, slowly let your knees fall to the floor on your right. Only go as far as is comfortable for you. Use your right hand to bring your left hip down to the floor if necessary, and turn your head to the left to get a complete stretch. Make sure you keep your left shoulder on the ground for the duration of the pose. Relax in this final position.
- You should feel a stretch in your lower back. Do this on both sides, slowly and gently coming out of the pose each time.
Child’s Pose

- Begin on your hands and knees.
- Bring your big toes inward so that they touch each other and bring your knees outward. Let your butt fall so it touches your ankles. As you do so, stretch your arms forward reaching with your fingers. Let your head melt down into the earth.
- Rest in this position.
Sphinx Pose

- Start on your stomach. Place your elbows under your shoulders (about an inch forward from your shoulders) and your palms flat on the floor.
- Simply hold this position for three to five minutes. If this pose is too hard on your lower back at first, lower your upper body a bit by bringing your shoulders down and your elbows out. If this pose is too easy for you, place a pillow or yoga block under your elbows to raise your upper body up and create even more of an arch in your lower back. If you get bored while holding this pose, read a book or watch TV.
Downward-Facing Dog

- Start on your hands and knees with your shoulders directly above your hands and your hips directly above your knees.
- Curl your toes under, and lift your body at the hips. The goal is to make your body look like an “A” or upside down “V.” Press your palms into the ground and try and make your heels touch the ground without bending your knees. If you need to bend your knees, that’s fine. You will increase your flexibility as you do this pose often.
Pigeon Pose

- Lie face up on the ground with your legs bent. Place your right ankle on your left knee.
- Lift both legs up, grabbing under your knee at your right thigh, using your arms to pull your right leg toward your body as far as is comfortable for you. If you want more of a stretch, pull your left leg toward your body (which will pull your right leg even farther).
- Hold in this position for as long as it is comfortable for you.
- Repeat on the other side.
Cat/Cow Pose


- Start on your hands and knees with your shoulders over your hands and your hips over your knees.
- Lift your back up like a cat stretching and bring your head down, looking toward your belly button. Then pull your belly down and look up at the sky (cow portion of the pose). For a deeper stretch, pull your toes under your ankles.
Sitting Spinal Stretch

- Sit on your butt with your legs straight in front of you.
- Bend your right knee, placing your foot on the outside of your left leg.
- Twist your body to the right, placing your left elbow on the outside of your right knee for a deeper stretch.
- Hold this position for as long as it feels comfortable. Do this on both sides.
Chirp Wheel+ Stretch
Sit and lean back.
- Sit on the ground with knees bent and feet firmly planted.
- Place the Chirp Wheel+ against your back in alignment with your spine. Take some time to center yourself and find balance even on the ground.
- Lean back gently to transfer your weight to the wheel. Relax and find balance in this position before lifting your hips.

Lift hips.
- Rest your hands on the ground, the wheel, or your chest for balance. Do whichever feels the most comfortable for you.
- Lift your hips upward while relaxing your back. Find balance with your hips lifted before rolling on the wheel.
- Don’t tense up! The more you relax your back, the better it will feel.

Roll back and forth.
- Begin to roll back and forth on the wheel by bending and straightening your legs. Use your hands for balance. If one spot on your back needs an extra massage, stop rolling to put pressure on that spot. Or switch to a smaller wheel.
- Roll out for 3 to 5 minutes. Length of preferred use will vary by individual.
- Relax your head back to avoid neck pain.
References
Ask Doctor Jo. (2017, March 7). Back pain relief exercises & stretches. Retrieved from https://www.youtube.com/watch?v=2VuLBYrgG94
Gopez, J. (2017, October 11). Stretching for back pain relief. Retrieved from https://www.spine-health.com/wellness/exercise/stretching-back-pain-relief
Mayfield Clinic. (2020). Exercises: back stretches & strengthening. Retrieved from http://www.mayfieldclinic.com/pe-exer.htm
Mayo Clinic. (2020). Back exercises. Retrieved from https://www.mayoclinic.org/healthy-lifestyle/adult-health/multimedia/back-pain/sls-20076265
Pain Pathways Magazine. (2016, September 1). The important benefits of stretching for pain relief. Retrieved from https://www.painpathways.org/the-important-benefits-of-stretching-for-pain-relief/
Rabbitt, M. (2019, September 27). 10 best stretches to ease your lower back pain, according to trainers. Retrieved from https://www.prevention.com/fitness/a20506161/5-stretches-to-ease-your-lower-back-pain/
