Stretching can help with instant sciatica pain relief because it creates space in the spine to relieve pressure on your sciatic nerve. When your sciatic nerve is irritated or pinched, it causes you pain, numbness, or a burning sensation called sciatica. Sciatica is usually caused by a herniated disc or other spinal issue which compresses part of the sciatic nerve. When the sciatic nerve is irritated, pinched, or compressed by another issue, you will experience pain or numbness anywhere from your lower back down to your feet (usually just on one side of you body). To learn more about sciatica, go here. Here are some stretches to relieve sciatica pain in just a few minutes.
Cat/cow


- Start on your hands and knees with your shoulders directly above your hands and your hips directly above your knees.
- For the cat pose, curl your head down to look at your navel as you simultaneously arch your back and tuck your hips in.
- In one fluid motion, transition to the cow pose as you release back to your starting position. Then pull your belly down to the earth and look up to the sky, putting a deep arch in your back in the opposite direction.
- Release and repeat multiple times.
Sphinx

- Start on your stomach. Place your elbows under your shoulders (about an inch forward from your shoulders) and your palms flat on the floor.
- Simply hold this position for three to five minutes. If this pose is too hard on your lower back at first, lower your upper body a bit by bringing your shoulders down and your elbows out. If this pose is too easy for you, place a pillow or yoga block under your elbows to raise your upper body up and create even more of an arch in your lower back
- If you get bored while holding this pose, read a book or watch TV.
Sphinx leg out

- Start on your stomach. Place your elbows under your shoulders (about an inch forward from your shoulders) and your palms flat on the floor. This is the same as the regular Sphinx Pose, but this time, bend your left knee and bring in outside of your body, pulling your leg up closer to your head (while leaving your leg on the ground).
- Simply hold this position for three to five minutes. If this pose is too hard on your lower back at first, lower your upper body a bit by bringing your shoulders down and your elbows out. If this pose is too easy for you, place a pillow or yoga block under your elbows to raise your upper body up and create even more of an arch in your lower back
Knees to ground

- Begin by lying on your back with your knees bent. Before you get into the pose, take some time to stretch your lower back by pulling your knees up to your chest and rocking back and forth. Leave your knees up close to your body as you begin the pose.
- When you’re ready, rest your arms out so your body looks like a T. Then, slowly let your knees fall to the floor on your right. Only go as far as is comfortable for you. Use your right hand to bring your left hip down to the floor if necessary, and turn your head to the left to get a complete stretch. Make sure you keep your left shoulder on the ground for the duration of the pose. Relax in this final position.
- You should feel a stretch in your lower back. Do this on both sides, slowly and gently coming out of the pose each time.
Sit and lean back.

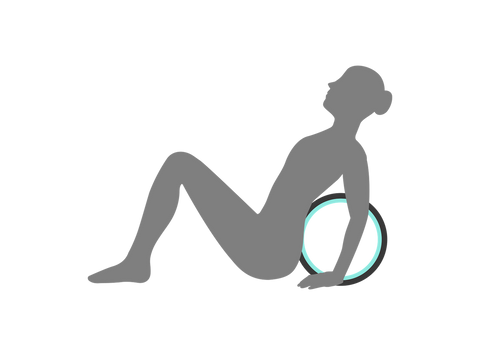
- Sit on the ground with knees bent and feet firmly planted.
- Place the Chirp Wheel+ against your back in alignment with your spine. Take some time to center yourself and find balance even on the ground.
- Lean back gently to transfer your weight to the wheel. Relax and find balance in this position before lifting your hips.
Lift hips.

- Rest your hands on the ground, the wheel, or your chest for balance. Do whichever feels the most comfortable for you.
- Lift your hips upward while relaxing your back. Find balance with your hips lifted before rolling on the wheel.
- Don’t tense up! The more you relax your back, the better it will feel.
Roll back and forth.
- Begin to roll back and forth on the wheel by bending and straightening your legs. Use your hands for balance. If one spot on your back needs an extra massage, stop rolling to put pressure on that spot. Or switch to a smaller wheel.
- Roll out for 3 to 5 minutes. Length of preferred use will vary by individual.
- Relax your head back to avoid neck pain.


